
Building a Standalone Craft Shop with WordPress and Woocommerce
Welcome to Episode 20 of the Craft Seller Success podcast. Have you considered a standalone craft shop? WordPress and the popular Woocommerce plugin can be used to create beautiful, flexible, feature-rich craft shops. Find out how…
Listen to the Building a Standalone Craft Shop with WordPress and Woocommerce podcast here, download it for later or read the transcript below.
Podcast: Play in new window | Download
Subscribe: Apple Podcasts | RSS
Listen on iTunes
To see the other episodes available – Craft Seller Success Podcast Main Page
This is the Craft Seller Success podcast from Tin Teddy. Episode number twenty – Building a Standalone Craft Shop with WordPress and Woocommerce
Welcome to the Craft Seller Success Podcast – helping craft sellers sell their crafts
Hi, I’m Deborah Richardson from Tin Teddy.
Introduction
Are you thinking of having an online craft shop of your own? Perhaps you already sell on a marketplace site like Etsy or eBay but would like the benefits of your own website?
In this episode of the Craft Seller Success Podcast, I am going to be talking about how one can set up a craft selling shop using a self-hosted WordPress website with the popular, free plugin, WooCommerce.
I have been building myself a new shop, so will be talking about how I did this, so you can see the process “in action”. I have built a few WooCommerce shops before and discovered a few shortcuts and tips on the way.
As usual, links to all sites, themes and plugins mentioned will be in the show notes on the Tin Teddy Blog together with a full transcript.
Planning your new shop
Before you start building your new craft shop, spend some time planning it. This will really pay off in the long run. If you are a regular listener you will know that I use the great free software XMind8 to help me plan things. This is a mind mapping software and available for computers, phones and tablets. Whilst it is easy to mind map on physical paper, using software is cleaner and easier to change things.
I also created a spreadsheet in Google Docs with a list of all the various things I would need to do to create the shop and added to it as I thought of new things – this is exactly the same process that I discussed in the episode 14 Goal Setting for Craft Sellers.
The spreadsheet was also a great place to dump anything I thought I might want later on, such as links to interesting looking plugins, theme ideas and lists of potential new product ideas. A note-taking program such as Evernote would also be great for this purpose.

Consider your branding
Think about what colours you will be using. What fonts will suit your products? Do you want a site that is bright and airy, dark and scary, colourful, modern, classical or funky?
Check out episode 5 Branding for Craft Sellers for more details on the various aspects of branding your own website that you will need to consider.
Consider your stock
What are you going to be selling in your new shop?
If you are going to be copying all your stock from an existing marketplace or other sites, print off a list now so you can check them off as you add them to the new shop.
Consider the types of products you will be selling and how you want to arrange them in the new shop. How will you group them together so visitors can find what they want? This can take a while to work out. I played with various combinations before settling on the structure I wanted to use.
Reindeer toppers will need to be classified as Christmas products, but they are also toppers, animals and made of foam… all ways I could group them.
Luckily with WordPress, there are various ways you can label and group your items. You can also put items in more than one group. Categories are the main group system, but you can also use tags too.

Features you want on the site
Think about the feature you will want on your site. I divided my “dream feature list” into three phases.
Phase One was all the features that I need to have a working site. This includes things like a functional checkout, the ability for the customer to choose shipping for where they live, essential pages like a Contact Me page and so on. Basically all the “must haves” that will make it a fully functioning, shoppable web site.
Phase Two is features that I would really like, and which I think will enhance my shop, make my customers lives easier or boost sales, but which are not really essential right now. The shop can be opened to the public without these features.
I will add the Phase Two features once the basic shop is up and selling. In this Phase, I included the ability for customers to shop in different currencies, a wishlist, extra features for checkout and so on.
Phase Three is features that I would ideally like but which are best delayed for now. They may be expensive to implement, time-consuming or fun luxuries. I have made a note of them and will consider them again when the shop is established and the more important things have been done.
In this Phase, I have fun ideas like the ability for customers to earn points when they shop, video demos of products, interactive fun features and additional product line ideas.
Once I had listed all the features I would like and grouped them thus, I was able to concentrate on my Phase One features.

Overall keywords etc – SEO
I’d recommend taking a little time to think about the SEO of the new shop. SEO is Search Engine Optimization, a topic I have referred to many times in the Craft Seller Success Podcast.
Consider what keywords you would like your shop to rank well for. Remember that “keywords” are rarely single words. Think about short phrases that accurately describe your products.
Make use of tools such as Google Trends to see how popular your keywords are. There are many other tools out there to help you do this – search online for SEO tools.
Make a note of your most potent keywords and then be sure to include them throughout your new shop site. Search engines such as Google can read all the text on your site. Keep SEO in your mind so that you are making the most of the various sections of your shop.
For a lot more information on choosing great keywords, check out episode 32 – Product Listing Keywords for Craft Sellers.
Preparation
I am not going to go into how to get and create a basic WordPress site here. If you want to know more about this, check out Episode 4 A Self-Hosted WordPress Site for Craft Sellers.
I am going to assume that you have paid for server space with a reputable hosting company and have a virgin installation of WordPress ready to go.
Much about creating a shop on WordPress is very similar to creating a basic blog.

Domain name
Your domain name will be the core of your shop. Take time to choose a good one. See my blog post A name for your Etsy shop.. five handy points. Although this is aimed at Etsy shop names, it is also applicable for domain names too.
I did something a little unusual for my new shop. I created the shop in a subdirectory of my main Tin Teddy site. The shop was able to have its own WordPress install and acts like a totally different site with its own theme and plugins.
But there are a couple of big advantages to doing it this way rather than creating a whole new domain or using a sub-domain, which is the more usual way of doing this sort of thing.
Firstly, I was able to apply the SSL certificate (more on this in a minute) to my main Tin Teddy site, and the new shop will also automatically get it too. If I had used a subdomain instead of a subdirectory this would not have happened and I would have needed two SSL certificates to protect both websites.
The other benefit is that the shop will automatically have some of the SEO attributes of the main Tin Teddy site. As my main Tin Teddy domain is 12 years old with good traffic, this is a very powerful boost to the new shop.
This means that my URL for the shop is www.TinTeddy.com/shop which is a nice logical name.
SSL certificate
Having an SSL certificate on your domain reassures your customers that your site is secure and they can trust you with their data. A website with an SSL certificate will have a little green lock next to the URL at the top of the screen.
In some browsers, you will get a warning if a site does not have this. Google has also said that they give SSL certified sites a little boost in search results compared to those sites that don’t have it, making it a more of a must for all sites nowadays.
Marketplace sites like Etsy and Shopify generated sites etc come with the SSL certificate. But if you are creating your own standalone site you will need to get one yourself.
There are free SSL certificates though they usually need regular renewing and may have limitations. I took advantage of a special offer from my web-host, GoDaddy to get mine, which was the simplest way. I will reconsider my options when renewing it next year as their non-sale price seems rather high compared to other SSL suppliers.
There are different types of SSL certificate, for example, some cover one site, some cover multiple ones. Search online to find out the options for getting one yourself and be sure to check your website host if you want a quick and simple solution.

Adding a Theme
Your theme governs how your site looks and behaves. It is the core of a website. You can create your own from scratch, but this requires a lot of time and knowledge.
There are vast numbers of themes to choose from, including many great free ones.
Take your time over choosing your new theme. It will be at the very heart of your shop and you want it to look good.
Nowadays a lot of people are surfing the web using tablets and smartphones. Therefore it is very important to have a theme that is responsive, in other words, one that adapts its layout to suit different sizes of screens. Most modern themes are responsive, but it is something to double check when choosing a theme for your new craft shop.
I was originally going to to go with a really good free theme called Estore from Themegrill, which I have used before. It looks good and is flexible to customise as your own. You certainly can create an attractive, feature-rich craft shop with a free theme if you want.
However, I did a bit of shopping around and eventually decided to buy the Puca theme from Themeforest at Envato Market. I had read a lot of reviews, and this theme regularly came up as being recommended.
I chose a premium theme that was designed to work with WooCommerce. This way I knew I would have the least issues with getting everything up and running smoothly. It includes many page templates etc which makes it very easy to get the basic site architecture up quickly. And of course, one can customise and change things to make it unique.
The theme came with some very handy plugins and has lots of features especially for creating a Woocommerce shop. For example, is included Slider Revolution which is a very powerful plugin for creating animated sliders for the shop’s front page. It also included WPBakery Page Builder which is a way to quickly and easily create complex page layouts in WordPress using drag and drop elements. I had used this page builder before and liked it.
Install the theme
Once you have installed your new theme take a little time to check out all its elements. If you are new to WordPress themes you may be disappointed that installing the theme hasn’t made a lot of difference to the way your new website looks. This is because the sample sites you saw in the theme marketing had pictures and content… and your new site doesn’t… yet.
One nice feature of the Puca theme is that it comes with what they call a “one-click demo installation”. This installs example pictures and content so that I could quickly see the layout of the website. I find it much easier to change existing content than start from scratch.
The installation also prompted me on which plugins it required, or advised, and within half an hour I had a working shop….. well, working in principle, with fake products!
If your theme doesn’t have such a feature you will need to wait until you have added a bit of content to start seeing some significant changes.

Customise the theme
Take some time getting to know the features of your new theme. Look at all the options in the WordPress tabs and read the documentation. You may discover exciting features that you will want to use that you hadn’t realised it even had! I did.
You can begin changing the various customisable aspects of the theme to suit your branding and ideas. I always change the main colours of a new theme first, once I had my usual Tin Teddy purple in place it felt more like “my site”.
I left most of my customising and fine-tuning until I had all the plugins installed and could clearly see how the overall structure was going to look.
Installing WooCommerce
Installing the “one-click demo” for my Puca theme installed the WooCommerce plugin as part of the process. You may need to install it separately to your theme.
It is available, for free, from the WooCommerce website. Or you can install it directly from the Plugins page within WordPress – it is one of the most popular WordPress Plugins, so should be easy to find.
If your theme is designed to work with WooCommerce, you will now have a fledgeling shop. For other themes, you may need to add a few pages etc to create the basic structure.
WooCommerce will create some pages that you need for a shop, such as a Cart, a Checkout Page and an Account Page, and will also set up a new type of post, called Products… for, of course, your products.
Set up WooCommerce
The WooCommerce activation wizard walked me through setting up a lot of the features I would need to personalise. If you get stuck with anything there are lots of tutorials on the WooCommerce websites, and on YouTube and many blogs too. You will also be able to easily get help on forums and social media as so many people use this popular plugin.
Set up Shipping
This is the one bit that I found a bit complicated at first. It was super easy for selling my digital products of course, as they don’t require any shipping… but physical objects needed a bit of reading and considering.
There are plenty of tutorials available, but basically, you need to create shipping zones for the various parts of the world you intend to ship to. I am in the UK, so I created UK, Europe, USA and Everywhere Else to get started. I can add more specific locations later on.
For each zone, you can create your different shipping options. Again I am keeping it as simple as possible to start with and just having a flat rate shipping fee.
There are plenty of options to allow you to set up the sort of shipping fee system that best suits your products and business model. You can also include shipping calculators so that your customers can choose the best shipping for them.
Set up a Payment provider
You will need to choose a payment provider to handle your customer’s money.
Paypal is probably the most popular choice for this. It is free and easy to link your Paypal business account to WooCommerce. Remember that you will pay a small fee to Paypal when your customers use it to buy from your shop – check your Paypal account to see what this fee is for your country as it varies.
Customers do not need to have a Paypal account themselves to use it in your shop – they can use their credit cards through Paypal.
There are many other payment options that you can include such as Stripe, Square, Braintree and Pay With Amazon. You will need to install a small plugin called a Payment Gateway for each payment method you want to use. Some of these plugins are free, others have a one-off or subscription payment. The fees associated with using each payment option also vary. Be sure you are aware of all the fees before choosing to use a particular payment option.
I am going to use Paypal in my new shop as I am very familiar with it, and use it myself when shopping. I will probably add Stripe and maybe a couple of other options later on.
Other Things to Customize
One section you may well want to customize, but it is easy to forget, are the various emails that WooCommerce will send out to your customers when they buy from you. There are quite a few of these including emails for new orders, new accounts, resetting passwords and failed orders.
These are found in WooCommerce, Settings, Emails in your WordPress backend.
You may be happy with the default text, or you may prefer to include a little of your own branding etc, which is what I have done. Be sure to check they are right before you open your shop to the public.
You will also probably want to customise the default printable receipt that goes in your parcels to include your branding etc.
Additional WooCommerce plugins
There are a variety of plugins that work with WooCommerce, known as extensions. If you look at the WooCommerce website you can see all these. Many are free, others come in a wide range of prices.
You may want to add a couple straight away or make note of ones that could be useful later on.
Other WordPress Plugins
Coming soon plugin
One of the most useful plugins I am using is the Coming Soon Page & Maintenance Mode by SeedProd. This is a very simple to use, free plugin. When in use, anyone visiting the new shop will see a “Coming Soon” message – or indeed any message you wish. The only person who can see the actual website is you… when you are logged into WordPress.
I have created a simple single-page graphic for mine and this is in place until I am nearer to opening the shop. I will then swap it for one which says when the shop will be opening, with links so the visitor can follow me on Facebook etc.
There is a premium version of this plugin too, with lots of extra features, including a cool countdown clock and some great ready-to-use pages.

Back up plugin
I’d strongly recommend you have some sort of backing-up system on your new shop. There are a few options for this.
I am currently going to use the All-in-One WP Migration plugin by ServMask, which is the same free backup plugin I use on my other WordPress sites. It works very well. There are quite a few different plugins available for this, both paid and premium ones.
I will, however, be considering a paid-for, automatic backup service in the future, for ease and peace of mind. I may use the one offered by my web-host, GoDaddy, or perhaps the one that is part of the premium version of the Jetpack plugin.
Whatever system you settle on, be sure it is turned on and that you are actually using it. I have reminders in my planner to backup all my sites on a regular basis.
SocialWarfare Plugin
If you are going to be posting regular blog posts on your shop site, I recommend a plugin such as Social Warfare which makes it easy for your visitors to share your content on social media.
I use the premium version of Social Warfare on my main Tin Teddy site and am very pleased with it.
There is also a free version that is very popular.
Contact form
A Contact Form plugin makes it very easy to add attractive contact forms to your website, in particular for use on your Contact Me page. I am using the popular free plugin, Contact Form 7 which is what the Puca theme recommended and I also use this plugin on my Tin Teddy and other websites.
There are, of course, others available, both free and paid versions with additional features.
SEO Plugin
You may want to consider an SEO plugin. This will help you ensure that your product listings and blog posts are optimised to be found by search engines.
I use the popular Yoast SEO plugin on both my main Tin Teddy blog site and my new shop site. There is a free version that has many useful features, and a premium version with even more.
There is also a WooCommerce addition to the Yoast plugin which is designed specifically to help your shop’s products get found in search engines. If you feel your SEO is not very good then this might be worth considering.
For much more about useful plugins, check out episode 23, Essential WordPress Plugins for Your Craft Seller Blog or Shop.
Important Pages
Episode 6 was entitled Six Pages Your Craft Blog Must Have – these six pages are particularly important for an online shop as well as blogs.
I will not repeat all that I said in that episode, of course, you can check it out yourself, hehe. I will just summarize some of the pages that an online craft shop will need.
An About Page – this will reassure your potential customers as to who you are, plus is a great opportunity to tell them your qualifications, skills and why they should buy from YOU.
A Contact Me Page – this is a real must. Make it easy for your customers and potential customers to get in touch with you.
A GDPR Privacy Policy – this is a legal requirement if you sell to the EU, but very useful for everyone with concerns about data security being in the news so often.
A Site Map – a simple way to help Google and other search engines find your products. As I am using the Yoast SEO plugin, this has a nice sitemap generating feature. You can also get a plugin to just do this feature, many people like the Google XML sitemap one.
Terms of Service Page – also known as policies. These are particularly essential for online craft shops. You will need to tell your customers about your shipping policies, how you handle returns and other valuable information. Not having policies will definitely cost you sales. I know I am not the only one who would never buy from a website that didn’t have any policies.
An Affiliate Disclosure Page – you are not so likely to have affiliate links in your shop as in a blog, but if you have any, you must disclose this fact.
For more about affiliates and ways to monetize a craft blog, check out episode 29, Monetizing Your Craft Blog.
Customised page not found page, also known as a 404 page – there are many reasons why someone might end up going to a page on your website that doesn’t actually exists. Whilst you should try to avoid errors, visitors may simply mistype a URL and end up on a “page not found”. You can stick with the default that WordPress will automatically display, but many craft sellers prefer to make their own custom version as this can be friendlier. Search online for “custom 404 page” or “custom page not found” to find out how to do this.
My Puca theme included a customisable 404 page, a nice little feature of this theme.
You may also want to add FAQs, Frequently Asked Questions. This is a popular way to pass to give your visitors information they may require before deciding to buy.
For more information on these pages, check out episode 6, Six Pages Your Craft Blog Must Have.
Branding
It will take a little while to customise the whole shop site to match your desired branding guidelines.
Colours
Check all over the shop to be sure your colour scheme is consistent. This will help your visitors know that they are still in your shop when moving around.
Fonts
Pick suitable fonts for your brand. So a standalone craft shop selling traditional wedding accessories may want a rather more classic looking font than a shop selling modern minimalist jewellery.
Do not use too many fonts throughout the site. Many web designers recommend sticking to three or less.
I’d recommend sticking to what are called “system fonts”, these are the most common fonts and easy to read. Do not use fancy fonts for basic text on your site. Readability must always be the priority. Keep the fancy fonts for headings and banners.
Remember that people will be visiting your shop on huge computer monitors and tiny little mobile phone screens, and everything in between. To ensure the fonts you use are easy to read at all sizes.
Don’t be afraid to have plenty of whitespace around your content. This makes it easier for visitors to digest.

Images – banner, logo, etc
You will need some custom graphics in your shop. Most shops have some sort of banner or shop logo that is on every page. If you don’t already have one, have a look on Etsy or a similar site for artists you can commission to make you one. You will be using it a lot so it is worth having a good one.
For lots more information on branding check out episode 5 – Branding for Craft Sellers
Products
Adding products to your shop is probably going to be the longest job.
If you have been selling already on a marketplace or other type of website, you may be able to export your listings from there and upload them to your new WooCommerce site quite quickly.
Even if you do this, remember that if you intend to sell from the original site too, it may be best to change the descriptions on the new shop so that Google does not have any issues with the duplicate text.
You will almost certainly need to change some aspects of the listing to suit the new format too.
I have often seen online shops where the listings mention auctions… clearly, the seller has used their existing eBay listings in a new standalone shop. This looks rather unprofessional. Make sure your listings are optimized for the selling platform being used. This will also improve your SEO too.
If you are considering using print on demand services to create and ship the products for your shop, check out episode 26 – Selling your Artwork or Designs using Print on Demand Services.
Pictures
Good pictures are as essential for your standalone craft shop as they are for any online shop. You will need good clear product shots that really show off the features of your items. You will also need some lifestyle pictures, that is photos of the products in action. Some of these can be used for illustrating other parts of the site too.
I will be speaking much more about photography for craft sellers in an upcoming podcast.

Copy – SEO
Copy is the text on your website, in particular, your product listings and descriptions.
Whatever type of online shop platform you are using you will need good copy. It serves three purposes:
- to tell the potential customer exactly what they are going to receive
- to convince them they need to buy it
- to enable search engines to find the listing – SEO
So you need to be sure that you are telling your customers everything they need to know about your product, including measurements, USPs (unique selling points) and special features and materials.
You also need to convince them that they need THIS item more than any others out there. Salespeople sometimes call this “the sizzle”.
And you need to be sure that your listings contain strong keywords and phrases that will enable it to be found when people search for this type of product in search engines.
I will talk much more about SEO for craft sellers, and writing good copy, in a later podcast.
Check out Episode 15 – A Shop Audit for your Craft Shop and episode 9 Sell Crafts Online – 9 Things You Must Do To Succeed for more info on writing copy that will help sell your crafts.
Price
The price of the item should be clear to your visitors. I have often been to websites where it is hard to find the price of an item for sale. I don’t buy from sites like this.
There are various plugins and extensions for WooCommerce to allow you to include exciting features such as comparison charts and special price stickers.
You can also have a wide range of offers such as multibuys, sometimes known as BOGOs or BOGOFFs, short-term sales with countdown clocks, free items, coupon codes and all the other promotional features you have no doubt seen when shopping online.
For more information on setting prices for your craft products, check out episode 11 Craft Prices – Setting a Product Price for Craft Sellers. I will be talking more about multibuys, sales and other promotions in an upcoming podcast.

Upselling etc
You can offer your visitors related items that they might like. This is known as upselling and is a very powerful marketing technique when done right.
So, for example, if your visitor is about to buy a ruby necklace from your shop, they may indeed want to know that they could also get the matching earrings… or even that they could buy both together and save a few pounds on buying each separately.
Or when your customer buys a knitting pattern from you, they may indeed appreciate being able to get the required knitting needles at the same time.
These options are not available on Etsy and many other marketplace sites and may be limited on some “shop builder” sites. But with WordPress and WooCommerce you have access to an almost unlimited variety of upsell variations which can really help your business.
Marketing
This is a very big subject and one which I am tackling in multiple podcast episodes.
Be sure you have set up links to your new shop in any existing websites you already have. And add links from your social media accounts.
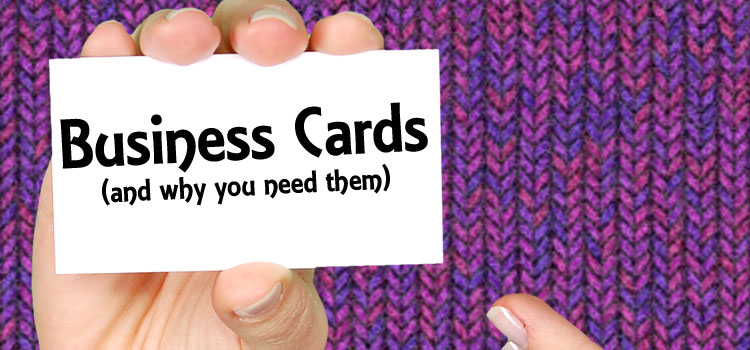
Consider whether you want business cards, and make sure your new shop URL is on them – for more information on whether business cards might help your craft business check out my popular blog post – Business Cards and Why You Need them as a Craft Seller.
Be sure to have a way for people to sign up to your newsletter. I use MailChimp for the Tin Teddy newsletter and there are free plugins to easily add the sign-up form to a WordPress site.
The biggest problem for most standalone craft shop owners is getting noticed. If you are not already using social media I’d recommend that you look into creating accounts with a couple of different social networks as soon as you can – ideally before you open your shop. Check out episode 8, Social Media for Craft Sellers 101 for lots of info on using social media to promote your crafty products.
I’d recommend creating some Pinterest pins for your new shop so visitors can share it – to learn more about Pinterest for Craft Sellers, check out episode 12 which has that name.
Some Other Things
You may want to connect your new shop to Google Analytics. This will enable you to see lots of useful information about your traffic, visitors and website performance.
I will be talking more about Google Analytics for craft sellers in an upcoming podcast episode.
Before going live be sure to have a look at how your new shop looks on a mobile phone screen as well as a computer monitor. The WordPress theme customiser feature has options to view the site on three different types of screen. You can also, of course, just use an actual phone.
There may be some options in your theme that are especially for mobile use, so make sure you have looked at those. They often include things such as how menus appear and whether you want to turn off some effects such as carousels or maps… these may not always work properly on small screens.
Handy hint – make a note of when your website hosting and domain name expire or ensure they are set to automatically renew. Many a craft seller has been frustrated and confused when their website has suddenly gone offline…. plus this could be costing you sales. And if your domain name expires. someone else might buy it!
If you are going to have a blog as part of your new shop site, write a few posts before opening the shop so there is some content there. For my shop, I wrote one that was a simple “Welcome to the new shop” post, one that says a bit about Tin Teddy and one that talks about why I use the materials I do in the embellishments I sell. I will not be using the blog partly as an actual blog, I already have my established main Tin Teddy site for that. I will be using it for news, special occasions and promotions instead.
Be sure your new shop has a working search system. Visitors may well know exactly what they are looking for so they need to be able to get to those items quickly. Ensure that a search box is clear on all pages and that you have menus etc to help them move around. The more products you have, the more essential this is.
Consider creating a calendar to help you plan your shop marketing. If you sell, for example, items that are likely to be popular at Christmas time, make sure you have them stocked in plenty of time.
You may want to check out episode 24 – Free Websites that could Help Your Craft Business for lots of useful resources.
If you are considering using print on demand services to create and ship the products for your shop, check out episode 26 – Selling your Artwork or Designs using Print on Demand Services.
If you are planning on creating a new shop, I wish you the best of luck.
And if you are wondering, my Tin Teddy Shop should be open by 1st February 2019.
Update – The Tin Teddy Shop actually opened in early March 2019, I wanted to add some great new features before opening.
I would love to hear about your personal experiences with creating your own craft shop. Please do leave me a comment on the show notes on the Tin Teddy blog, or contact me via social media – just search for Tin Teddy to easily find me.
Links to all the websites, plugins etc mentioned are in the show notes together with a full transcript on the Tin Teddy Blog.
The next episode of the Craft Seller Success podcast, episode 21 is called Preparing for a Craft Stall or Craft Show. It will be out on 22 January 2019. In this episode I will be talking about how to prepare for, survive and profit from a craft stall at a fair, show or market.
Thanks for listening. Please subscribe to the Craft Seller Success podcast.
Check out www.TinTeddy.com for more Craft Seller resources.
Until next time, bye
The Craft Seller Success Podcast from Tin Teddy.
Featuring Deborah Richardson
Original music by Matthew French

