
Today I am making a new page in my art journal, using some new Tin Teddy graphics in the process.
I printed out the Tin Teddy Vintage 1920s Paper Dolls set and chose one of the little girls for the layout. I then had fun trying on and deciding on her outfit. I went for a snazzy green number. I glued the clothes onto her with Cosmic Shimmer glue and coloured over her shoes with a clear Sakura Glaze pen to make them shiny like patent leather. I put her to one side whilst I worked on the background.
The Background
First I masked the edges of my journal page with low-tack tape. I then painted the page with a light pink emulsion paint (I actually used one of those test-pots of emulsion you get from DIY stores). My paintbrush began shedding hairs half way but I carried on as a perfect finish is not necessary at this stage.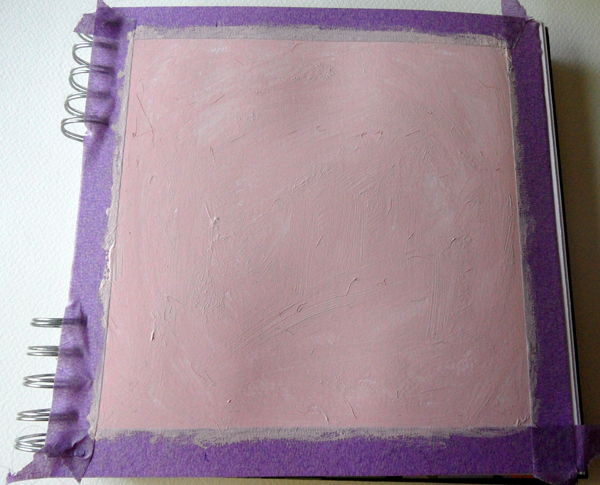
Next, I used a home-made brick stencil and dabbed Abandoned Coral Distress Ink through in patches around the page.
Then I used two different background stamps to apply first more Abandoned Coral and then Picked Raspberry Distress Ink randomly over the page.
I then gently sponged more Abandoned Coral Distress Ink around the edges of the page to darken them. It looks a bit messy right now, but…
Now for the dramatic change!
I sprinkled Yellow and Brilliant Red Brusho colour pigment all over the page. I then spritzed it with a few squirts of water. I waited about 10 seconds then blotted the page with a kitchen towel. The water reacted with both the Brusho and the Distress Ink to create a lovely, soft background with lots of texture and interest. I left it to dry for an hour.
I added a bit more Picked Raspberry Distress Ink around the edges then used little stamps from Leonie Pujol’s “Arrow to the Art” stamp set to add some little decorations in the two colours of Distress Ink.

The Quote
I stamped a quote from Lavinia Stamps on to some vintage watercolour paper with Memento Tuxedo Black Ink. I used my Tim Holtz Stamping Press (Tin Teddy review of Tim Holtz Stamping Press) for this so I could stamp multiple times to get a good impression – I did this as the paper has quite a tooth and it is hard to get a perfect stamped impression the first time. I used an X-Cut corner punch to round the corners then added some Picked Raspberry Distress Ink around the edges.
Assembly
I removed the masking tape (always exciting) and fixed the doll to the page with Ranger Multi Medium Matte. Next, I cut three green fronds and two pink flowers using dies by Tattered Lace. I used a pink alcohol marker and added simple “veins” to the middles of the flower petals to make them a bit less flat looking. I glued the top two-thirds of the sentiment down onto the page then poked the fronds in place under the bottom. I added the flowers and then put a large dot of Pastel Yellow Dovecraft 3D Pearl Effects in the middle of each flower.

Finishing Touches
I used pink CreaBox Acrylic Mousse through a (Barbie!) stencil to add some dimensional little stars around the page.
Finally, I added a few little blobs of Brights Green Dovecraft 3D Pearl Effects (mainly because I bought it this morning and am itching to use it!).

Here is a link to the Tin Teddy 1920 Vintage Paper Doll Printables – there are lots of dolls and clothes for you to use in your own projects. And as they are printable, you can create as many as you want! And you can sell physical things you create using them too.
